A custom-built WordPress plugin that helps to create image slideshows and videos for a client’s in-store monitor display.
This article may contain some technical terms which provides an overview of how I constructed this custom functionality. If you have any questions, please let me know.
What is the main problem?
The main reason why the client wants this type of functionality is that they want to cut some operational costs. Digital signage services are quite expensive services. I developed this functionality so that the client can just create unlimited image slideshows and videos that can be displayed in their stores.
How I built the application?
This digital signage builder was divided into two parts; the back-end part, and the front-facing of the digital signage.
The Back-end – Signage Settings:
The back-end part was developed using React JS for the settings’ user interface.
I didn’t use the create-react-app package to develop the Settings UI, because of its default configurations. The reason for this is because when a create-react-app initiates the build process, it will export a lot of files (js, CSS, assets, etc.) which I don’t like for this task. It will just add some more configurations when building the entire plugin.
What I need are just a single script & stylesheet files that contain all the customization and logic of the app. I can just include these files in the settings area when needed.
To accomplish this goal, I need a custom Webpack setup and configuration. This custom configuration will give me control over where to export my files and use some of the Webpack plugins.
Now let’s talk about the application’s state. As always, I used Redux to manage the state of the app. It was easy to change some settings by controlling the global state.
The Front-end:
This part of the signage builder is responsible for the view only, so I just need a simple React setup. Although create-react-app is a good choice for this, I still didn’t use it. I built a custom setup and this time I used the Parcel bundler instead of Webpack. I want to try Parcel not because it was gaining popularity at that time, but I want to see if it’s much simpler to use than Webpack. So far for this project, the configuration is much less compare to Webpack.
Since the front-end is for view only, I just need it to fetch data and not POSTing something back. I still used the WP REST API to fetch the signage data.
Feature overview:
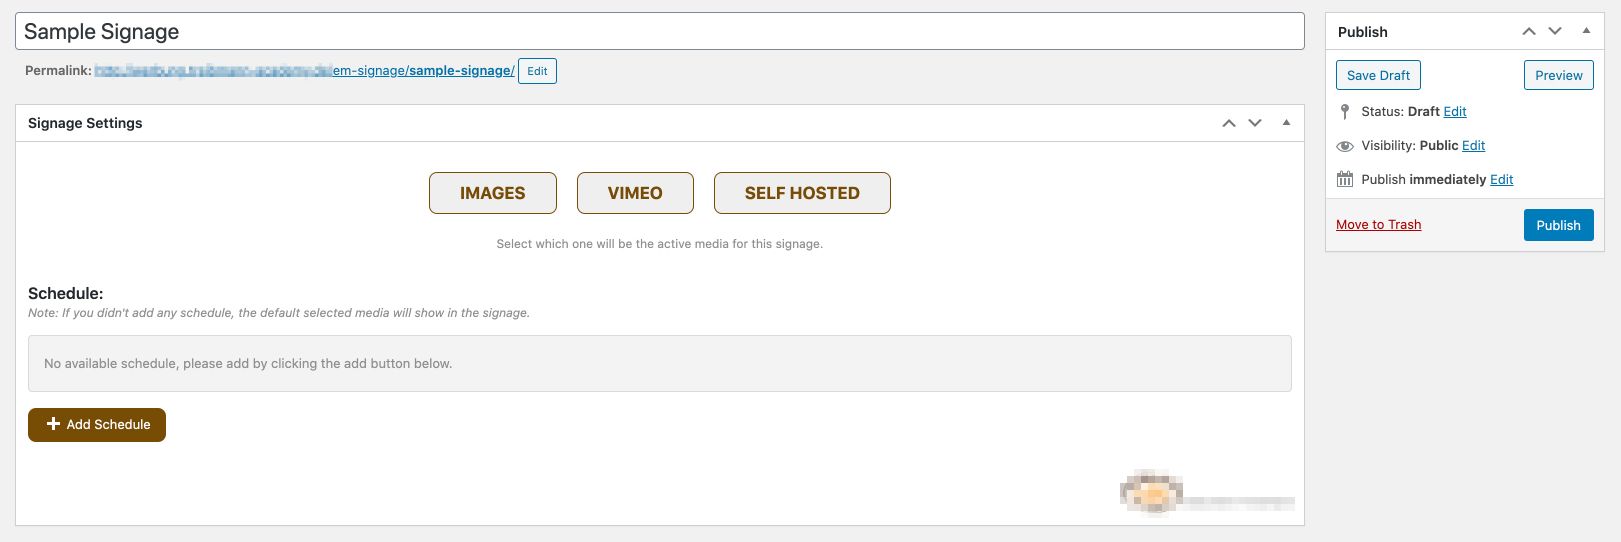
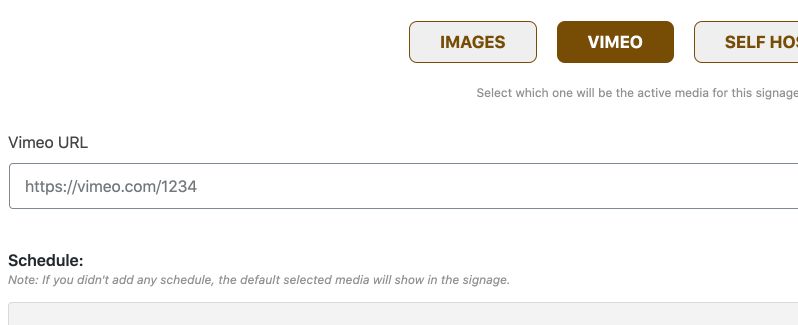
- Three media type available: Images, Vimeo videos, Self-hosted Videos
- WordPress Media Library integration
- Unlimited signages
- Add schedules – display different media types according to their schedules.
- Developed on a WP Plugin environment so it’s easy to share with other stores.
How does the application work?
Using the signage builder is simple. Since this is a WordPress plugin, the user needs to install the Digital Signage Builder plugin first to activate the functionality.
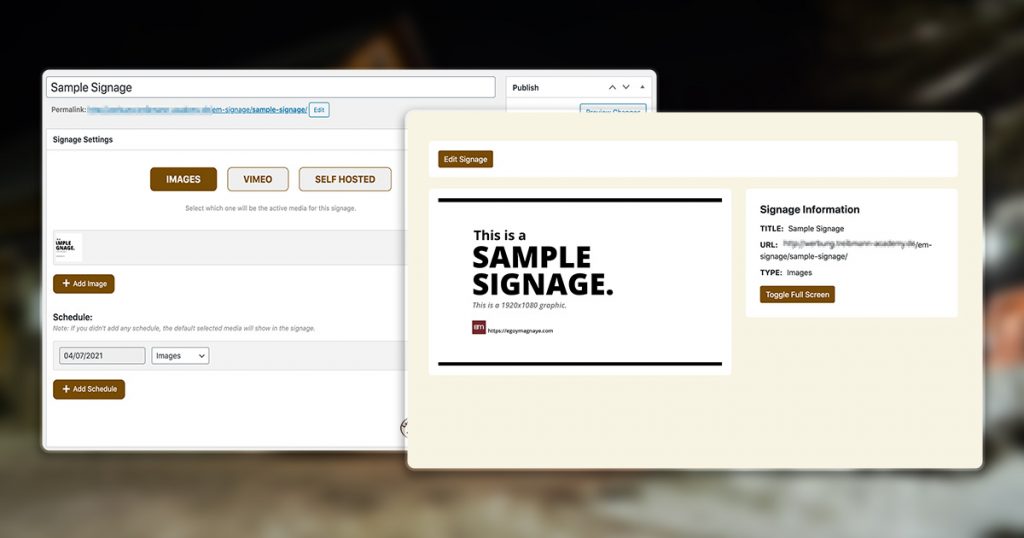
If the plugin is activated successfully, the plugin will add a custom post type to the admin area. The user can add unlimited signages.
If the user has added new signage, it will show the signage settings. The user needs to choose between Images, Vimeo, or Self-hosted Video media type. By default, the Image media type is selected.
The Image media type is completely integrated with the WP Media Library.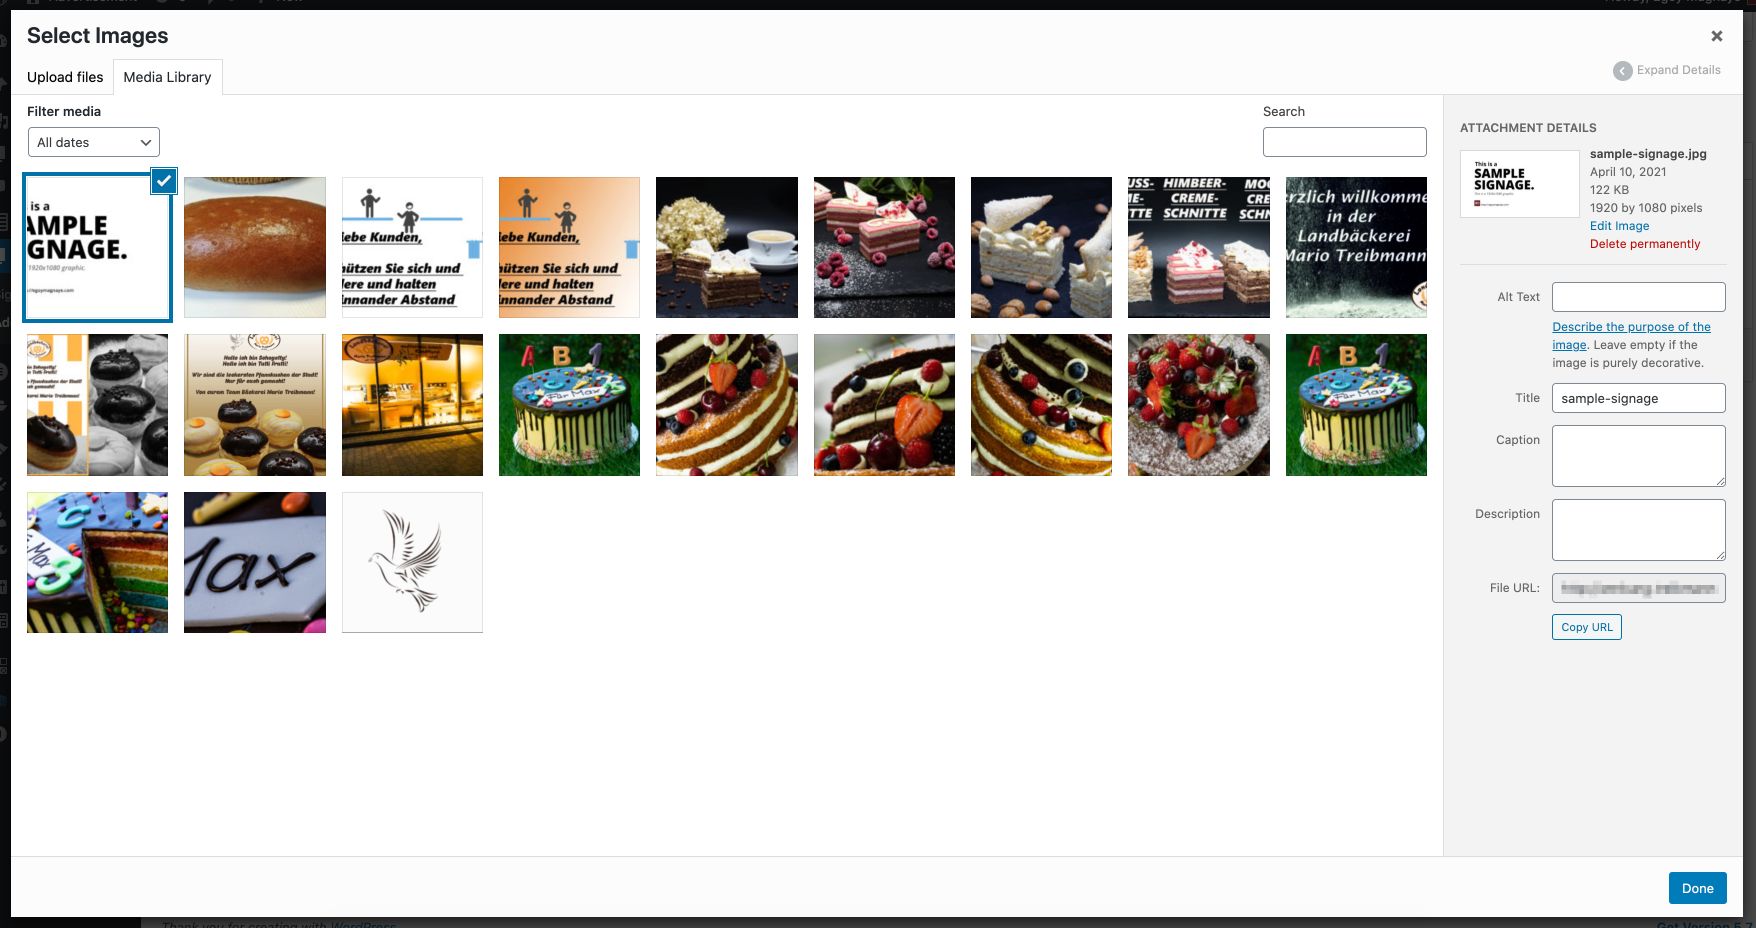
The user can add schedules for each media. This will control what media to show on the front-end. The client requested this feature because they are creating signage for a whole week of operation at once. They just need to reload the digital signage in the front-end and the correct media type will be displayed on their monitors.
If all signage settings were configured properly, they can click the Publish or the Update button to save the signage. After saving it, they can go to the signage display by clicking the link at the top after the signage title.
The user will be redirected to the signage display. The media type that will be displayed depends on what media type is selected in the backend.
The signage display contains some basic info about each media type. Toggling fullscreen depends on each media type. For Image, there’s a Toggle Fullscreen button, while the Videos have their toggle fullscreen by default. The Edit Signage button is displayed only when an admin user was logged in.