Here is a case study of a recent project I completed for an Australian company that sells home improvement products. This project is custom store locator widget that helps their customers find the nearest retailers in a given area.
What is the main problem?
The client asked me to build a functionality that enables their customers to find their affiliate retailers in Australia. The retailer locator must have some sort of filter functionalities that will help the customers to find the nearest retailers to a given area and limits the search result with the business type category. The search results must be displayed on a map.
Feature Overview:
- Integration with Google Maps
- Find the nearest retailers in a given area.
- Limit the results with the retailer’s business type (e.g. HVAC-R, Civil, Building, etc.).
- Find specific retailers in a given area.
This article may contain some technical terms which provides an overview of how I constructed this custom functionality. If you have any questions, please let me know.
How did I build the application/custom functionality?
This store locator was built using the React.js library. I know this type of functionality can be done also in a vanilla Javascript development approach but I want to use the flexibility of React in building custom widgets and apps. Another reason is it’s so easy to manage the application’s state in React.
I used the React Context and useReducer to managed the functionality state and not Redux. I think using Redux is quite overkill for this specific widget’s functionality.
I used the Formik package to render form components. I find it easy to control or manage input fields, errors, validations, events, and a form’s state when I use Formik.
In terms of styling the widget, I used the Tailwind CSS to add the styles.
I think the most complicated part of this widget was the integration of the Google Map APIs. It’s easy to show the map in the widget, the difficult part is how to show the retailer’s map pin conditionally. I need to show the retailer’s map pin that is only located in a given radius or area.
For example, a user wants to find all the retailers within a 10 km radius. All the retailer’s map pins within this area will be visible on the map.
To be honest, I’m not that good when it comes to Google Maps API because most of the time I’m just embedding maps to my client’s website and there is no complex customization like this one.
I read some of the Google Maps API documentation, I tried to look for related issues that might help as well. After several searching, I came up with a helper method that I can use. Based on Google Map docs, there’s a method called “computeDistanceBetween”.
Basically, this method needs the retailer’s position (latitude & longitude), and also the center position of the given area.
This method will return a distance value that I can use to compare with the user’s provided radius. If the value (distance) is less than or equal to the user’s provided radius, it means that the current retailer is within the given area.
Minimize working on your website without breaking the bank
I’m here to simplify your website management & development, handling all the technical aspects for you.
How does this store locator widget work?
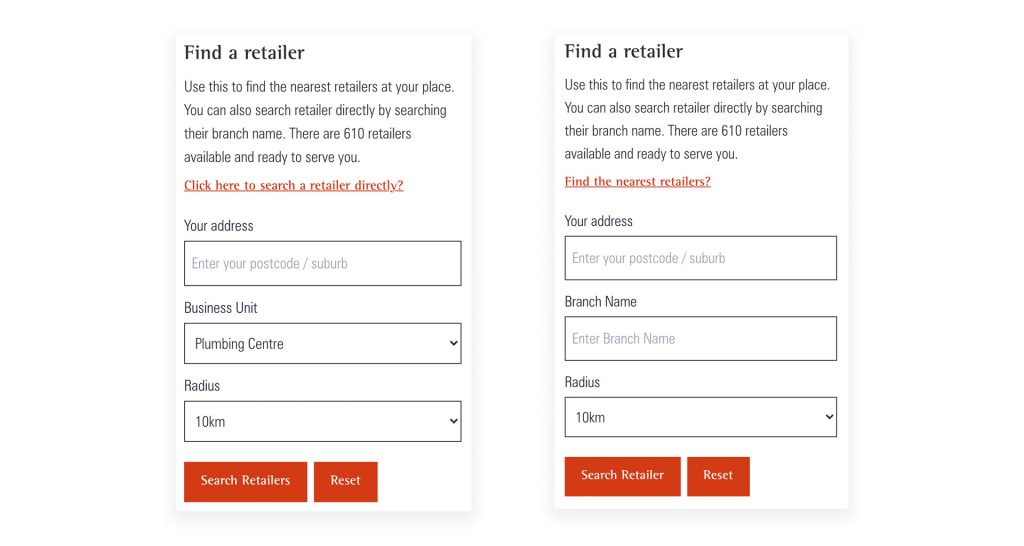
It’s easy to use this widget. The user can choose between searching for the nearest retailers and searching for specific retailers. They can easily switch between different forms.
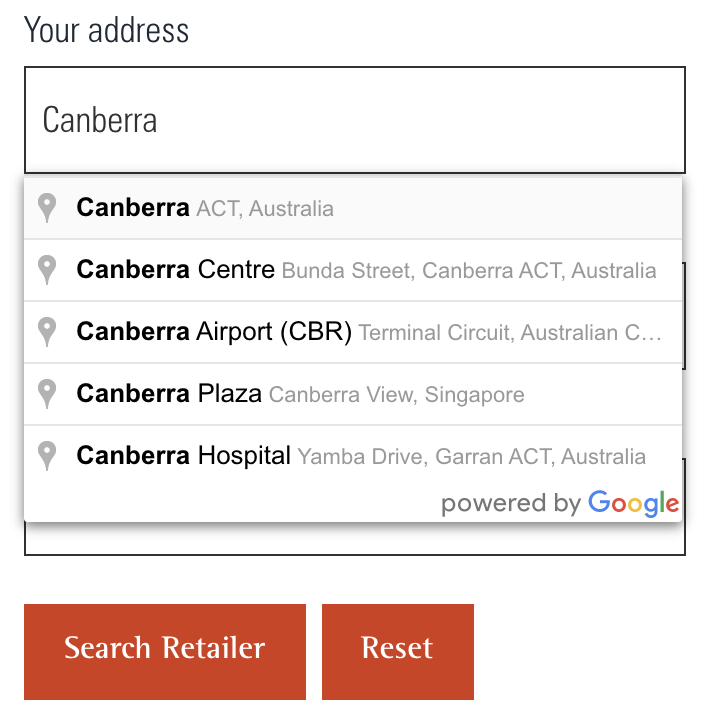
The Address input field is connected to the Places Library of Google Map API. This gives an auto-complete feature so whenever a user searches, a handy suggestion dropdown will show.
The Form for Searching Multiple Retailers:
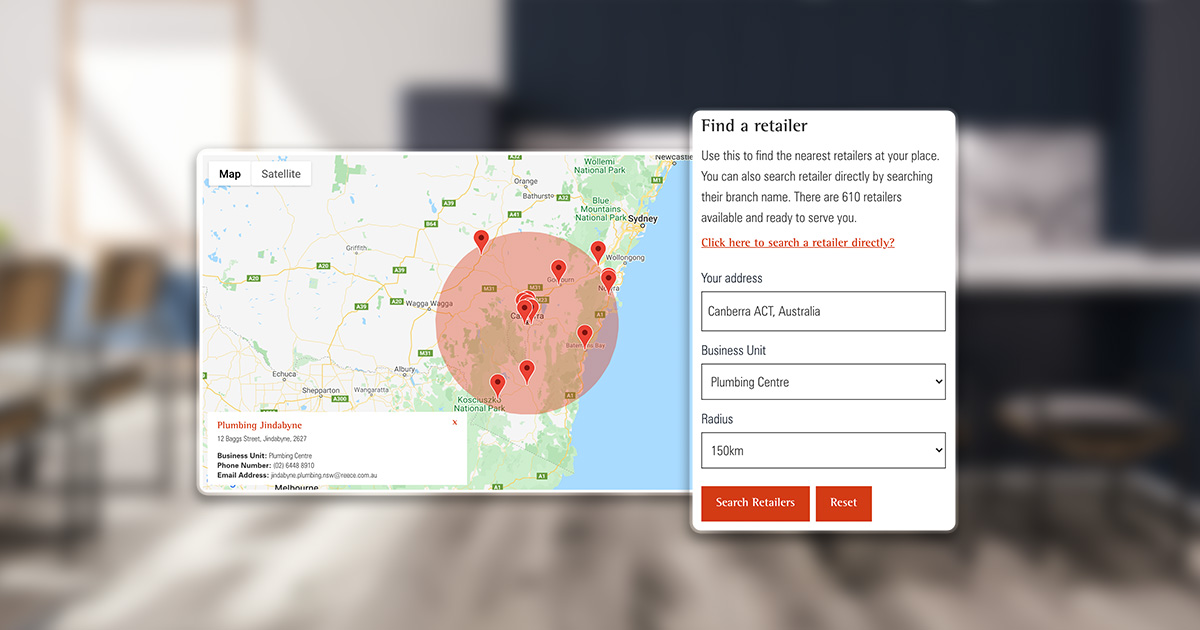
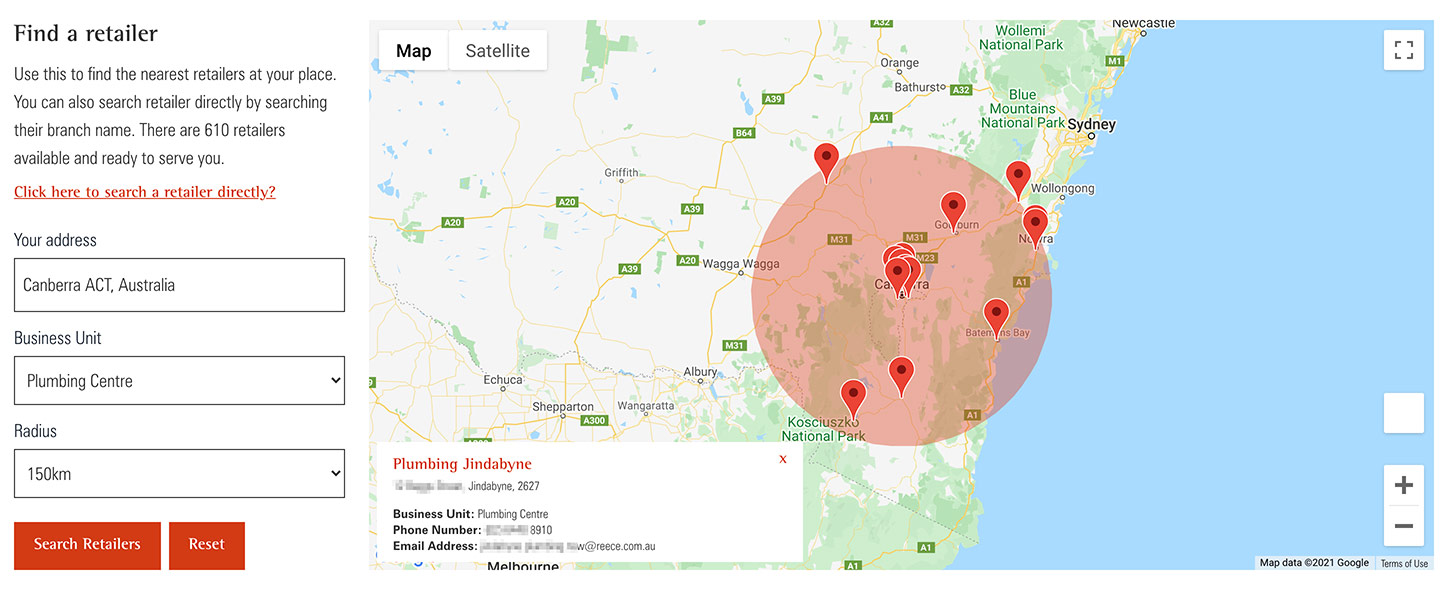
The default form contains input fields for the Address, Business Unit, and the Radius.
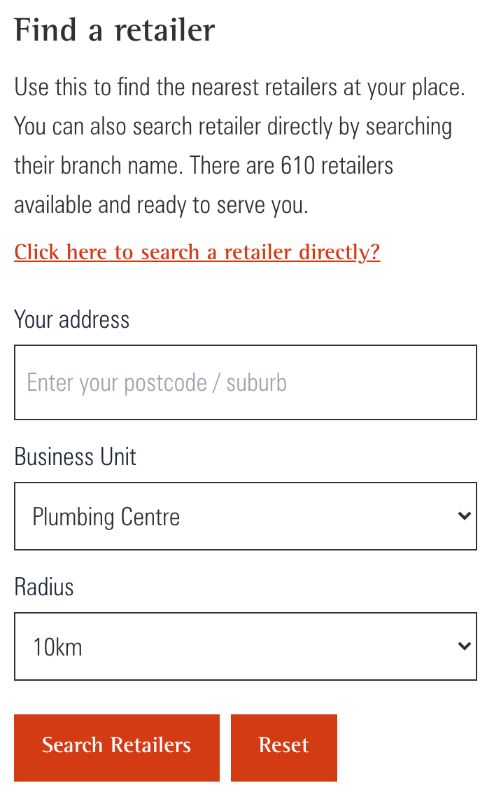
Address – Input for getting the address of the user. Behind the scene, this will get the latitude and longitude of that current address that will be processed to get the retailers.
Business Unit – This is the retailer’s category. The users can choose between these categories to filter out the retailers that they are looking for. This is not required data, if the user didn’t choose any business unit, all retailers in that area will show.
Radius – This is responsible for getting the area in the map that the user wants to search for. For example, the user wants to search for retailers within 25 km using the given address as the center position.
If they are done completing the form, they can click the Search Retailers button. The map will show all the retailer’s map pins that are located in that area.
The Form for Searching Specific Retailer:
This form works like the default form but instead of showing all retailers in that area based on the business unit category, it will show specific retailers only. This is useful for searching retailers directly.
This form contains the same input fields except for the Business Unit field, it was replaced with the Branch Name field.
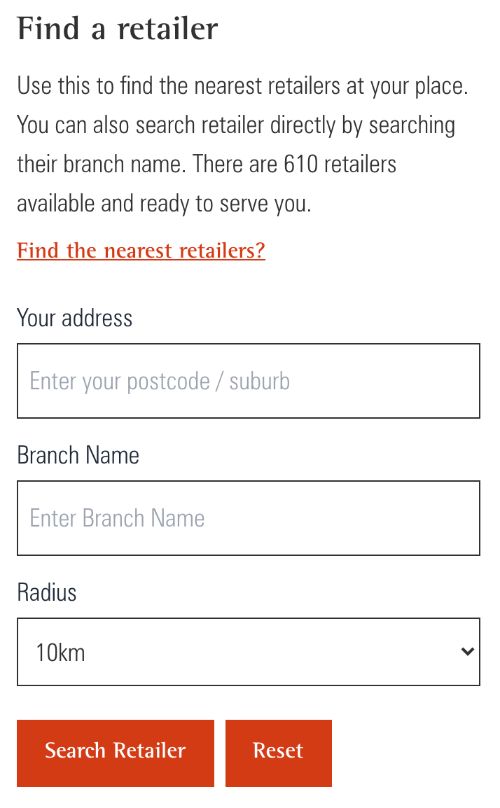
Branch Name – This field is responsible for getting the retailer’s branch name. The keyword doesn’t need to match with the branch name exactly. If the current search matches multiple retailers, the retailer’s map pins will show on the map.
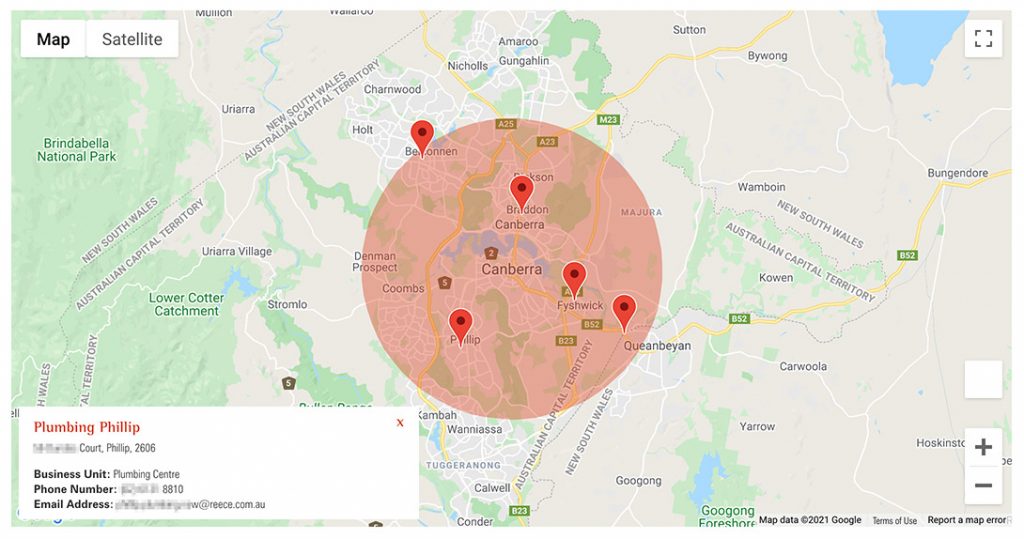
The Map:
Whenever a user searches for retailers, all the map pins in a given area will show on the map. If a user clicks a pin, a custom info window will show at the bottom left corner of the map. This info window will show the details about the currently selected map pin.
The Reset Button
If the user wants to do a new search, they can just click the Reset button to restore the widget to its default state.
The Integration Process
The website was built using the WordPress CMS, so I need to find a way to easily integrate a React functionality into this type of platform. There are two ways to add custom functionality to a WordPress website.
The first and most common way to add it is to add it to a custom theme, or if the WordPress website is using a child theme. The other way is to add it using a custom plugin.
The approach I chose is to create a custom plugin that I can easily install on their website. Creating a plugin helps to separate the functionality from the website’s theme, so that, should the client choose to redesign their website again, the functionality will still be available and work properly.
Do you want to see the project in action? You can visit the custom retailer locator at the Akril website, which I designed and built as well.


